Tuesday, December 22, 2009
Sunday, November 22, 2009
First Aid pt. 2
Had to see how First Aid would look with the new viewer, so I went ahead and converted it. I think this is a much better way to view the pitches. Any thoughts?
g
PS_Oh yeah! Be sure to see it in full screen view! Looks so much cooler!
g
PS_Oh yeah! Be sure to see it in full screen view! Looks so much cooler!
Friday, November 20, 2009
Fugue Viewer
Just trying out a new way to share the comics. You've GOT to see it in FULL SCREEN MODE!!!! Woohoo!
Thursday, November 12, 2009
Holy Crap! I was a winner for once!
Hey guys,
Recently, Comic Geek Speak had a cool contest in conjunction with artist Freddie Williams II. I was one of 4 winners for the contest! Unfortunately, I didn't win the Grand Prize, which was an in depth portfolio review/critique by Freddie, but it was still a super fun and cool contest and am so glad I got to be a part of it. By being one of the winners, I did win a copy of Freddie's book and also had a little interview on the podcast.
If anyone is interested, you can here the interview right HERE. I sound like I am from Fargo or something:) Check it out!
Anyways, below is the piece that got me into the winner's circle.
Guy
Sunday, November 8, 2009
First Aid
Here's another recent pitch done with the very talented Sam Rugg. It's called First Aid. The concept is this: Every day, all over the world, people in first aid classes try to bring training dummies to life. First Aid looks at what happens when someone finally does it.
First Aid was another super fun pitch to work on. Sam is such a talented writer; so full of imagination. Look forward to big things from him! Pencils, inks, colors and letters by moi!
I hope you enjoy!
g
All art © Guy Allen and Sam Rugg
First Aid was another super fun pitch to work on. Sam is such a talented writer; so full of imagination. Look forward to big things from him! Pencils, inks, colors and letters by moi!
I hope you enjoy!
g
All art © Guy Allen and Sam Rugg
FUGUE
Hey everybody!
In trying to update the blog in proper fashion, here is some more newer stuff!
The following is a recent pitch I did in conjunction with super-talented scribe Elton Pruitt. It's called FUGUE and has been describes as Enemy of the State meets The Package in a “ripped from the headlines” story of a covert U.S. power play in the Middle East. It was a really fun project to work on and taught me a lot about my own working process. All art done by me. Letters by Jason Hanley.
I hope you like it!
Guy
All art © Guy Allen and Elton Pruitt
Character Concepts
Here is a character concept for a project with Australian writer Sam Rugg. We actually have a bunch of characters designed already, but I thought I'd share one with you all.
g
All art © Guy Allen and Sam Rugg
g
All art © Guy Allen and Sam Rugg
Saturday, October 24, 2009
CGS Batman
Tuesday, September 1, 2009
Page Process
I'm gonna start this off just like every other blog I read and say that it's been a long time since the last post. I know. I've been mega-busy. I'm married now. I'm a much wiser man than the guy in my last post. Been half way around the world. Got tons of stuff in the works that should be surfacing pretty soon, but that's another post. So onto the task at hand...
Someone requested me to do this. I feel like I am still learning all the time and am by no means an authority on anything, but here it goes: my process for quick coloring in comic books. I hope it can shed a little insight on someone else.
Step 1:
To begin, I loosely sketch out a thumbnail at about 2 or 3 inches in height which I use for the page layout. Here I include notes for myself as to what I might want to change, colors I have in mind, etc. Once it's done, I blow it up to full page size and use it as an underlay; often moving things around through out the process. As you can see, I ended up moving around the three panels at the bottom into a more dynamic arrangement.
Step 2:
I pretty much go right into finished lines from my thumbnail. This is probably a horrible idea, but it's just how I work. I will do a more detailed underlay though, if I have a crazy perspective shot or a close up on faces or hands... anything really difficult.
Step 3:
Here I start flatting out the piece. This consists of basically coloring in the lines. I isolate forms/ objects of importance where I don't want the color going into an object next to it. For instance, the girl in the second frame is all blue on it's own layer. The coffee table underneath is a peach color on the layer below her. Basically I am separating objects by using color. In the image below, I have 4 different layers that I am isolating with; each layer holding a different color. Then I hit the "Preserve Transparency" button and now I can't color outside of those color fields.
The rest is pretty basic rendering techniques really. Unfortunately, I don't do tonal underlays like the good painters do. I only do that if I am actually painting with brushes. Here I will go straight into color.
Step 4:
Now I start laying in basic tones of how I want the piece to feel and start setting the mood with color. I am trying to establishing the local color for every item in the image. I am making the important items in the frame stand out by their colors. Pushing and pulling things until a hierarchy is formed by the colors. Remember this needs to read quickly. The viewer needs to see first what you want them to see first. One way to accomplish that is through color choices.
Step 5:
For the girl, I begin by establishing her main flesh tone. Once that's in, I start in on either the darks or the lights, depends on the mood. If I start in on the darks first, I will start with her main value and then go a little bit darker in all of the areas I want dark. Then I go a bit darker the farther I go out, in order to fully express the volume. Then darker and so on, until I hit the darkest value that I want for her shadows to be. Then I do the opposite for the lights. It's all about light source, intensity, value and temperatures.
Step 6;
Once the flesh is done, I start on the dress and do the exact same thing. Now I am also making sure that these colors all look like they go together and blend.
Step 7:
Step back. Change some things. Notice I made a color shift in the wall at this stage. Something just wasn't feeling right to me overall so I had to change it. Add the highlights only on the important things. Put the icing on the cake. Done.
Again, this isn't the best way to do it; it's just the way I am working at the moment. I hope it helps!
g
PS_My equipment is a 2.16 GHz Intel Core 2 Duo iMac running Mac OS X v. 10.5.8 (Gonna get Snow Leopard in a couple days) Work in Corel Painter 9.5 and PS3. I've found both programs to be better at certain tasks than the other. This piece was done entirely in Painter. I use this tablet.
Thursday, July 9, 2009
It's Almost Time...
Hi everyone. It's been a whirlwind time for me lately, both personally and professionally. I haven't been able to post in a long time due to all of the action going on over here. I'm all set to get married this weekend and then we are off on an amazing European honeymoon for 16 days. I can't wait! All of our families are starting to arrive in town and so the pressure is really on now. So far everything has gone off perfectly. Gonna try my best to follow everyone's advice and just chill out and enjoy it...
On the comics front, there are some interesting developments happening as of late. Wrapping up one project right now and have a few more on the table that sound very enticing. Have been approached by and met several really great people in the comics community recently. Trying to find my spot within the industry is hard work and a lot of sacrifice, but it has been a pure joy.
ok, I gotta go! Thanks to everyone and I'll see you all real soon. I already can't wait to start working again.
g
Wednesday, May 20, 2009
Monday, May 18, 2009
The Flashes!
Monday, May 11, 2009
P.U.M.M.E.L. Tournament Round 1
This was done for PencilJacks's P.U.M.M.E.L. Tournament. In the first round my opponent got to pick the topic. He chose "Mounted Cobat." This is my submission. Didn't really have enough time to work on it, due to other obligations, but I thought it turned out pretty good for what I had to work with. Hope it goes well! :)
Sunday, April 19, 2009
Zombie Linework
Thursday, April 2, 2009
Something a little different...
Wednesday, March 25, 2009
Magneto Sketch
Here's a sketch I did last night for another Pencil Jack thingy. The deadline was yesterday, so I only had about an hour to work on it. Bumped it out fast cuz I wanted to participate. Could have been a lot better, but I actually really enjoy the whimsy and looseness of the colors. I like the vibrancy and intensity of the color against the stark background. Wish I would have put something up on the ceiling so that you could tell we are looking at him floating. Should have put a shadow down below too.
I still have no idea what's happening in this photo. There's supposed to be a flower in his hand, but for some reason, on the web version, it's really hard to see. Oh well!
Tuesday, March 24, 2009
ETSY STORE BACK UP!
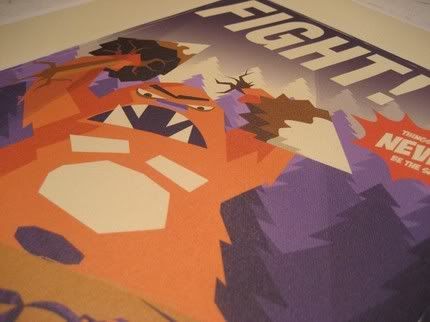
Good news: The Etsy store is back up and running. I am hoping to have some new prints coming down the pipe soon so stay tuned. Gonna be adding some origianl art as well, from small watercolor sketches all the way to big ole', fully rendered paintings! Right now all that is available is the Yeti vs. Robot print (Only 6 remaining!) but be sure to check back for more later.
Up next: I am probably gonna make some prints of the "50 Years" painting! The print process is great so I am really excited to see how this one turns out! It's a favorite of mine.
Click below to be directed to the store!!
Up next: I am probably gonna make some prints of the "50 Years" painting! The print process is great so I am really excited to see how this one turns out! It's a favorite of mine.
Click below to be directed to the store!!
Friday, March 20, 2009
Giant Robot Action!
Tuesday, March 17, 2009
Thursday, March 5, 2009
Ultimate Fantastic Four Submissions
Here are my Ultimate Fantastic Four pages that I submitted in New York. The sequence was taken from Ultimate Fantastic Four #21 by Mark Millar. The cover image was drawn digitally and the rest are pencil. Looking back on them I see tons of mistakes. I think I was in too much of a rush.
Enjoy.
g
PS_As always, comments and critiques are welcome.
Continued in next post...
Enjoy.
g
PS_As always, comments and critiques are welcome.
Continued in next post...
The Rest of My Submissions
Tuesday, February 24, 2009
50 Years
Tuesday, February 17, 2009
Guy Gardner Submissions
Here is the first set of pencil submissions I put out there. It is an action sequence for a story called "Collateral Damage" by Chuck Dixon. I believe is was Guy Gardner #15. After looking back on them, these pages have their problems, but, they say all artists have 1000 bad pages in them before they get good, so I need to start cracking.
Hope you like them
g
Hope you like them
g
Thursday, February 12, 2009
Draw Night
Monday, February 9, 2009
Ouch. It hurts.
Hi All,
Got back from the New York Comic Con late last night. Had a great time there, but unfortunately, things didn't quite work out the way that I had wanted them to.
That's okay though. Still gonna keep trying, still gonna keep honing the skills and making them sharp... sharp like Wolverine's nose!
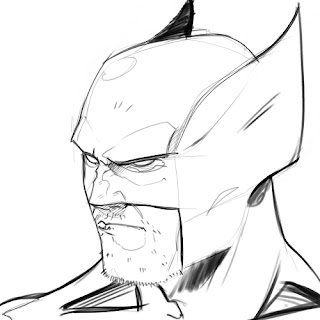
Here's a sketch of Wolverine's nose.
g
I will be posting the pages I brought to NYCC in the following days and then starting on new ones! Stay tuned!
Wednesday, January 7, 2009
2009!
Subscribe to:
Posts (Atom)